The Art Studio

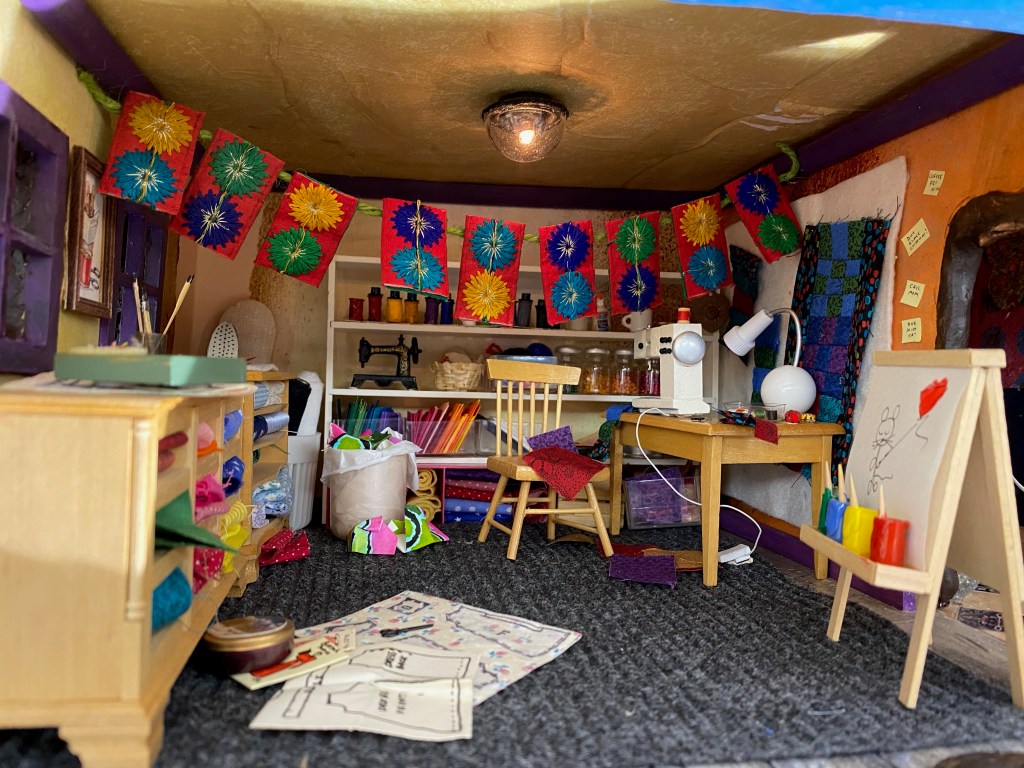
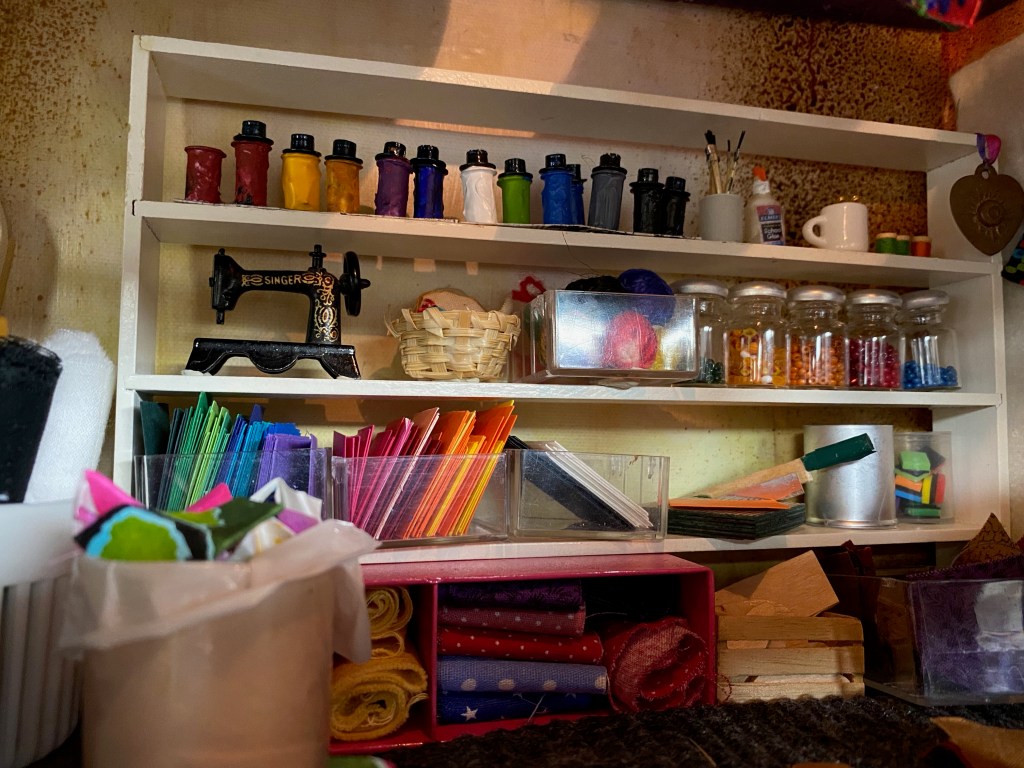
The sewing room/art studio in the Mouse House took some thought. It was hard to decide what should go in it–I have so much in my own studio that paring it down was a challenge.

I began with the paint jars and brushes. The “jars” are just slices of a plastic drinking straw I cut and painted. I then attached “snap” for the tops. I also made bins of scrapbook paper and a bottle of glue from a plastic syringe and a label from the internet.

Paint jars, bins of paper, glue and brushes on the studio shelves.

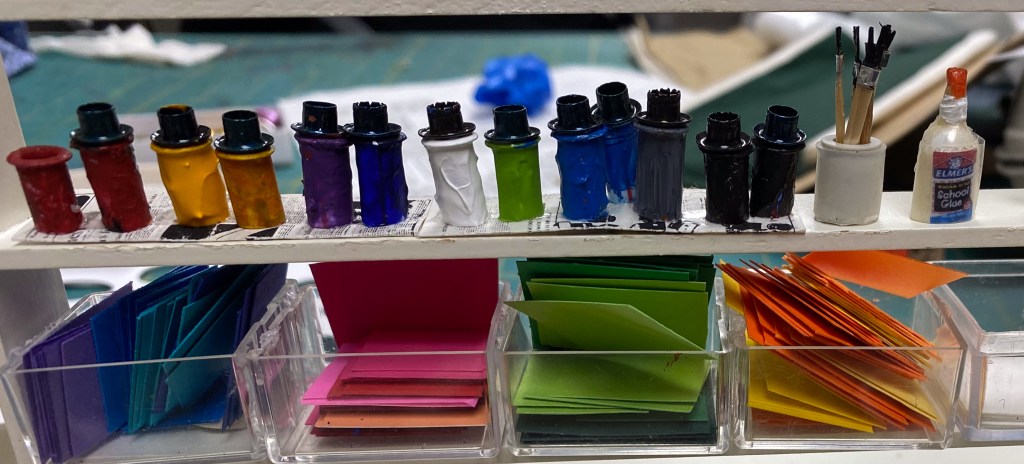
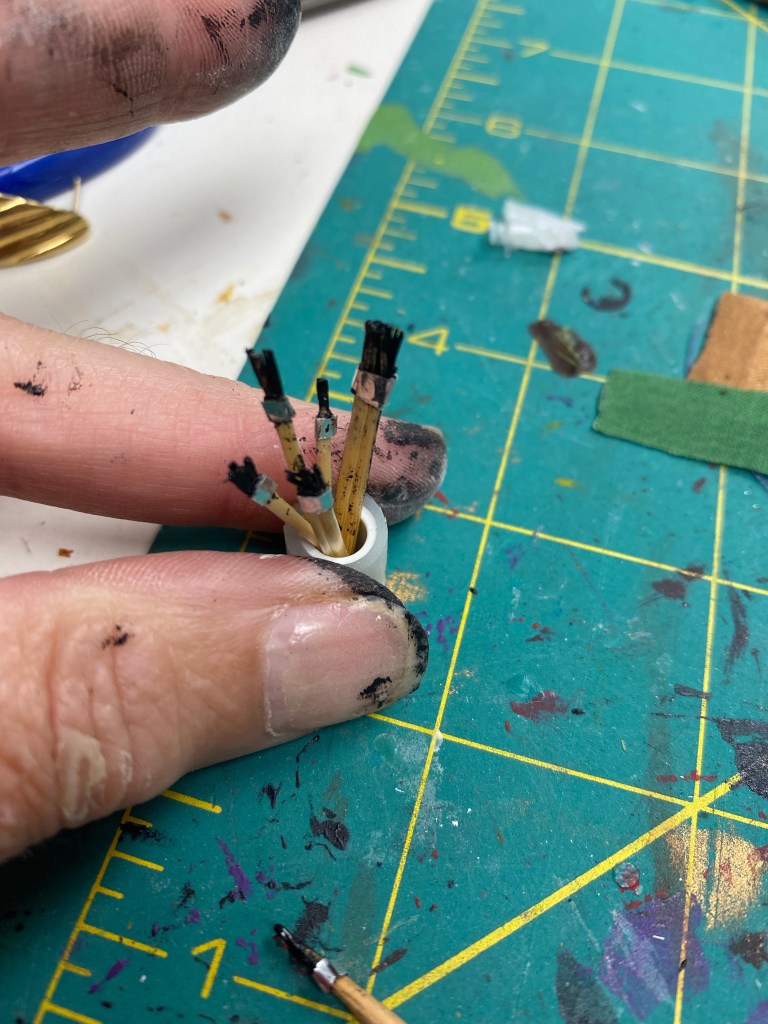
I made the paint brushes with small skewers trimmed to size. I was able to “shred” the skewers at the top to make the bristles which I then dipped into black paint and wrapped with a silver piece of foil.

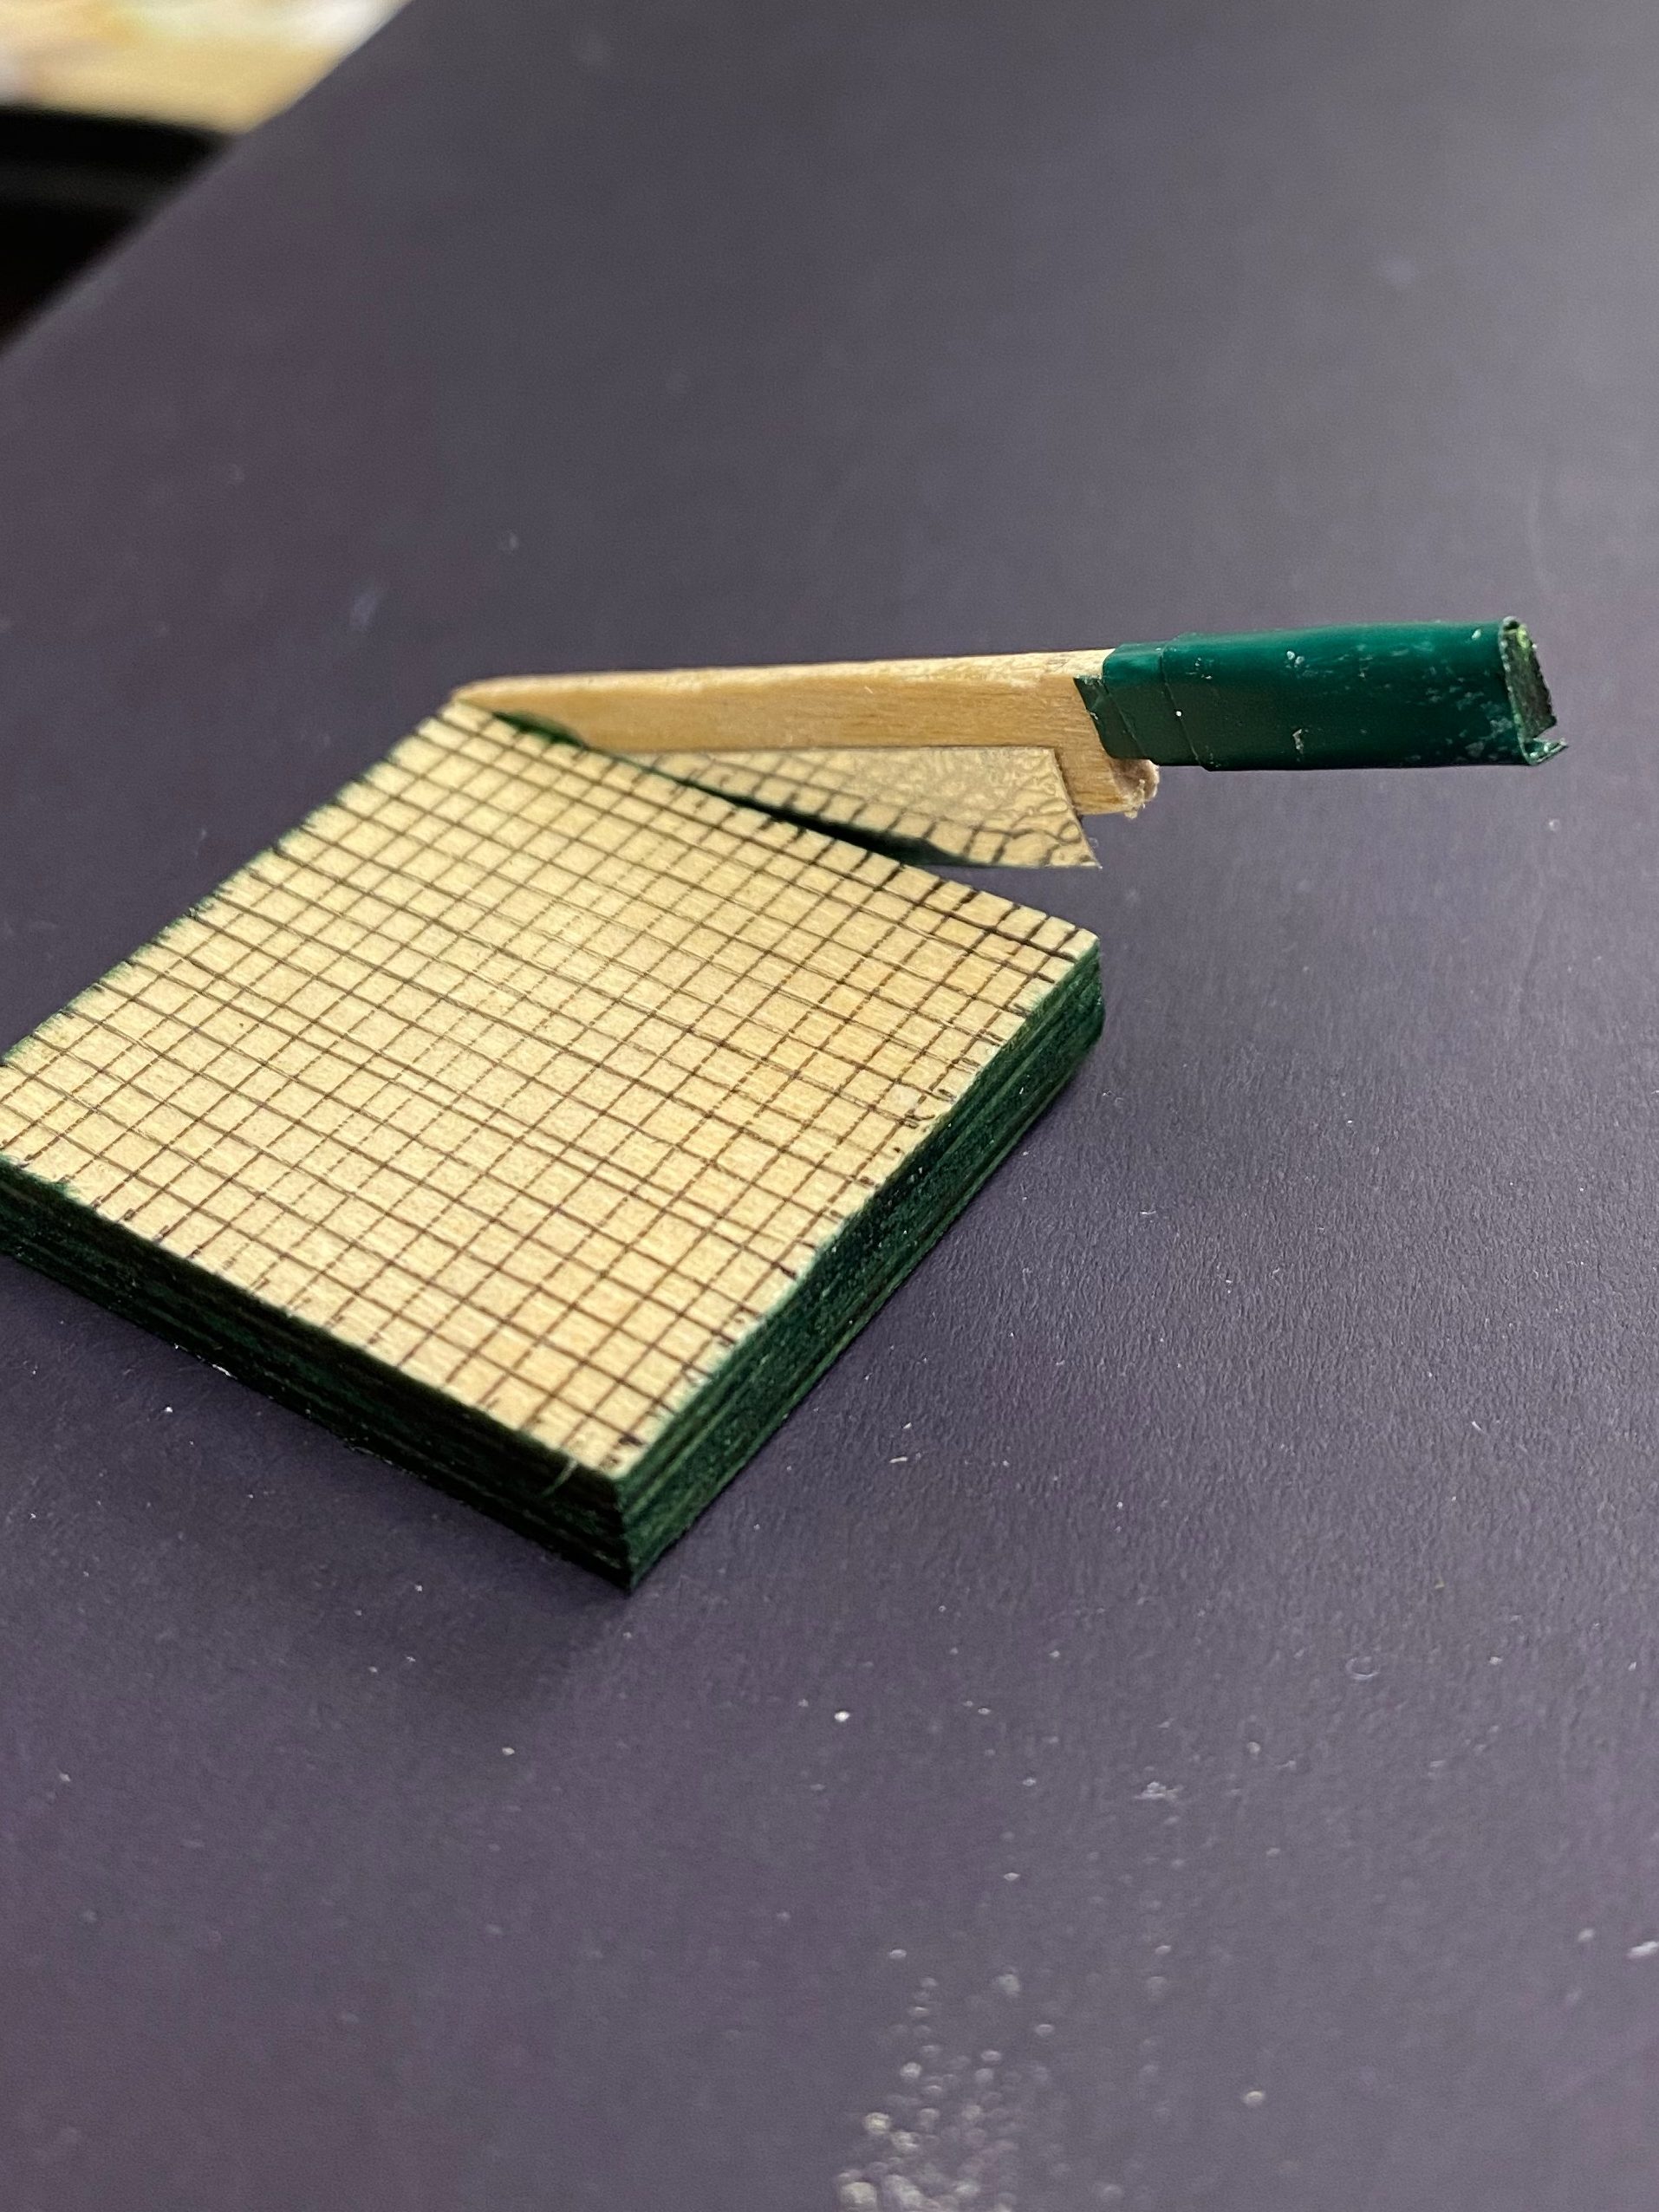
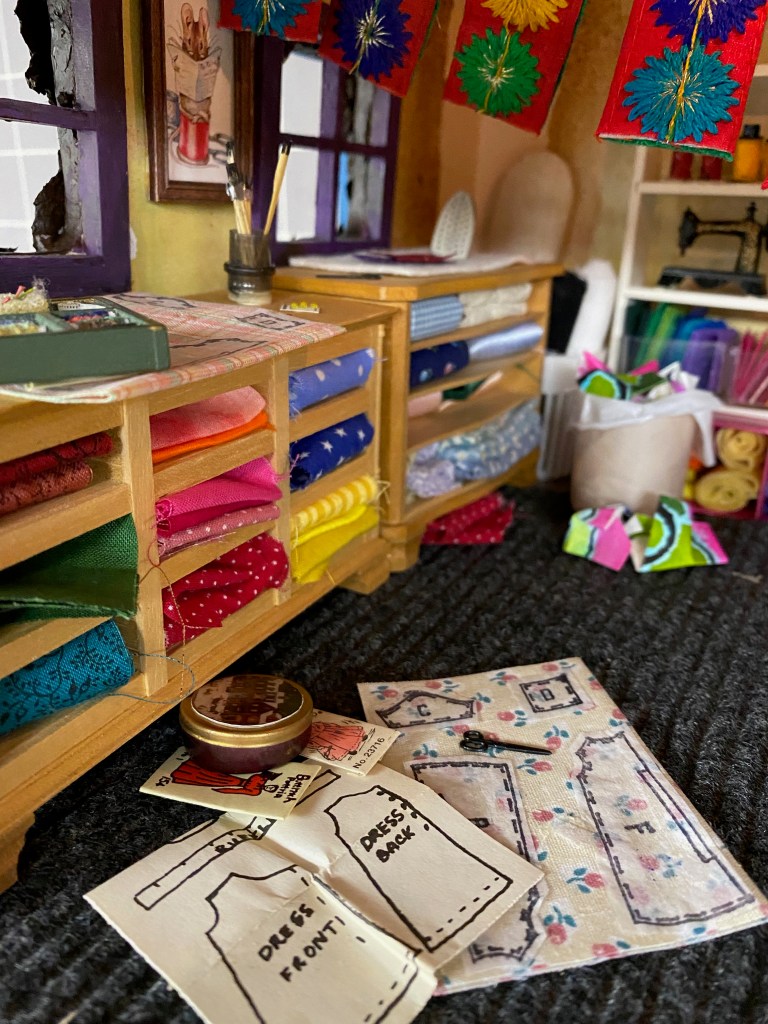
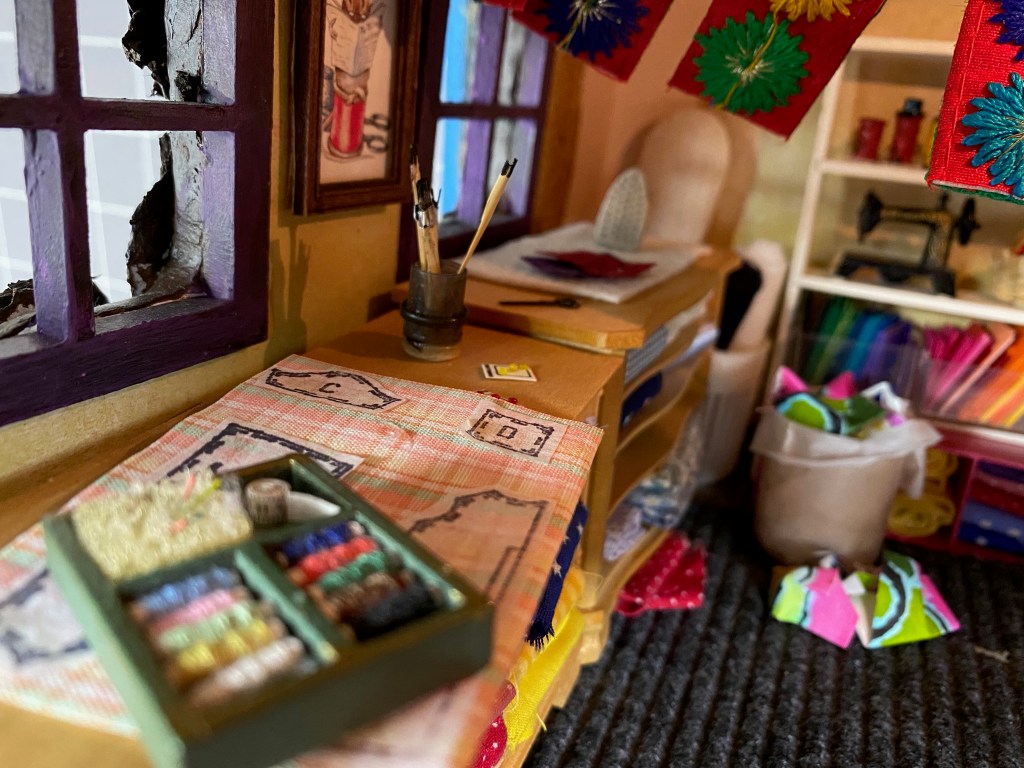
I completed the shelves with bins of yarn and fabric, bottles of buttons, a crate of scrap wood and a paper cutter I made with wood and foil.

The storage shelves in the art studio.
A close-up of the paper cutter (with thanks to my friend Jan for the idea!)

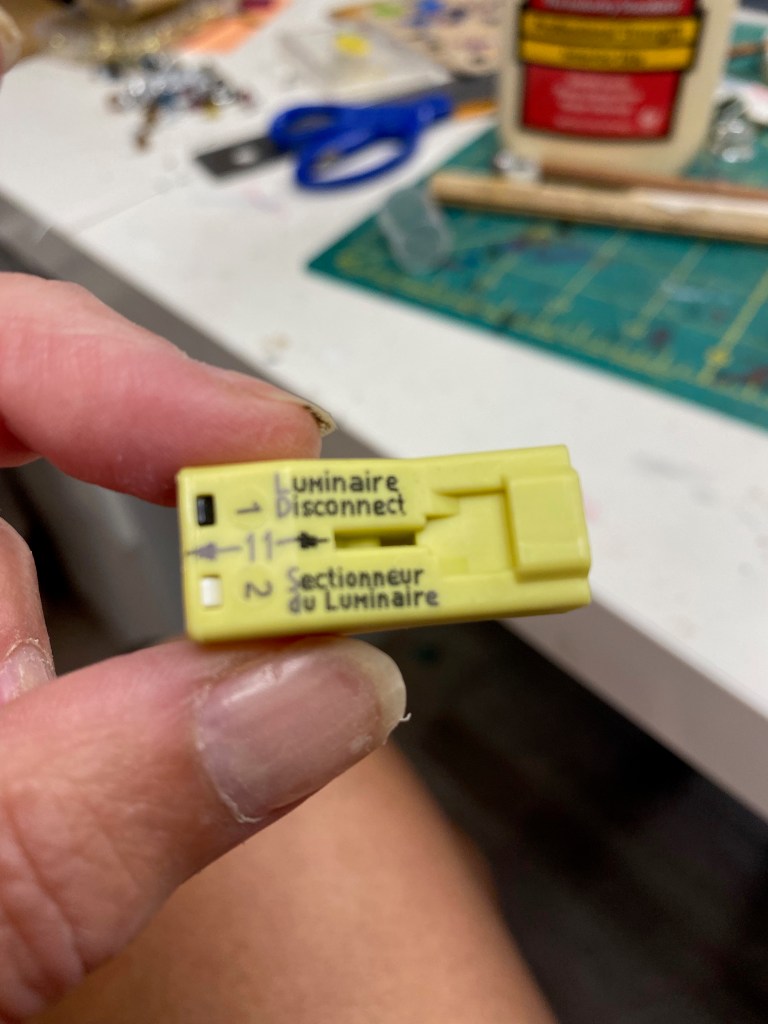
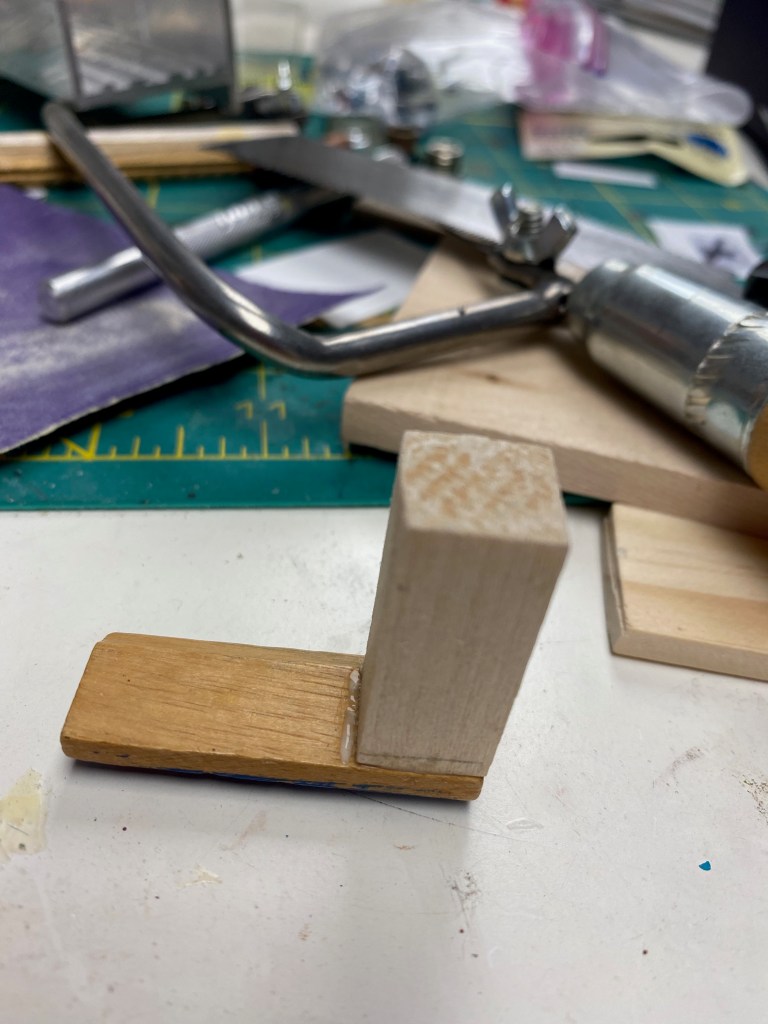
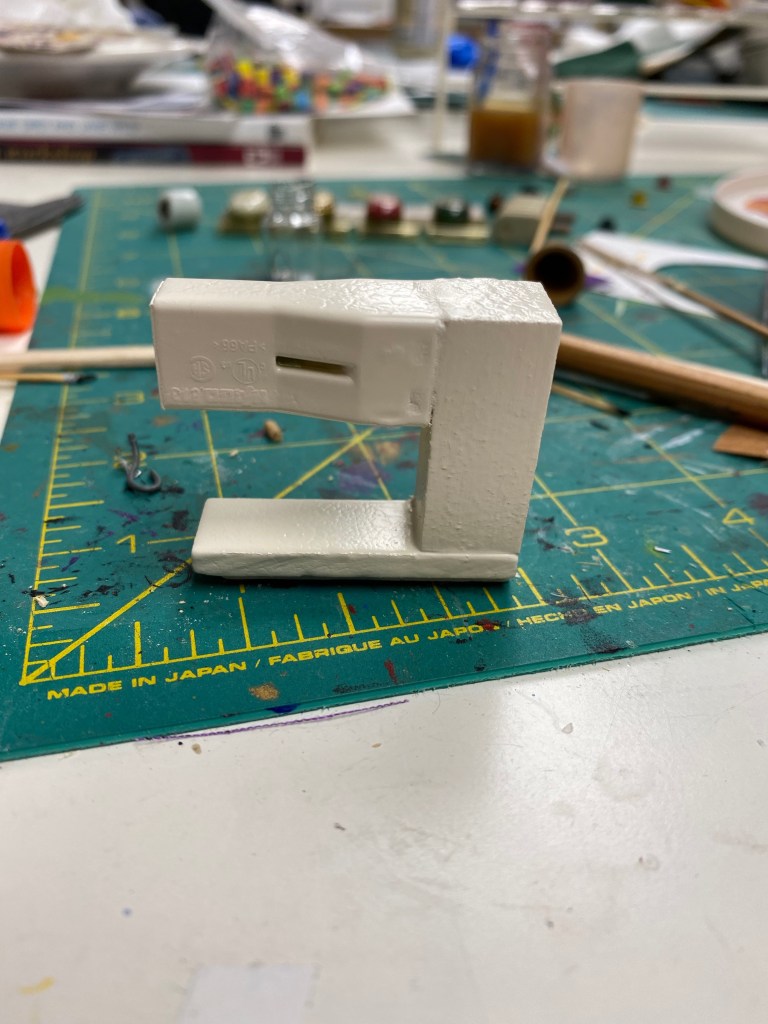
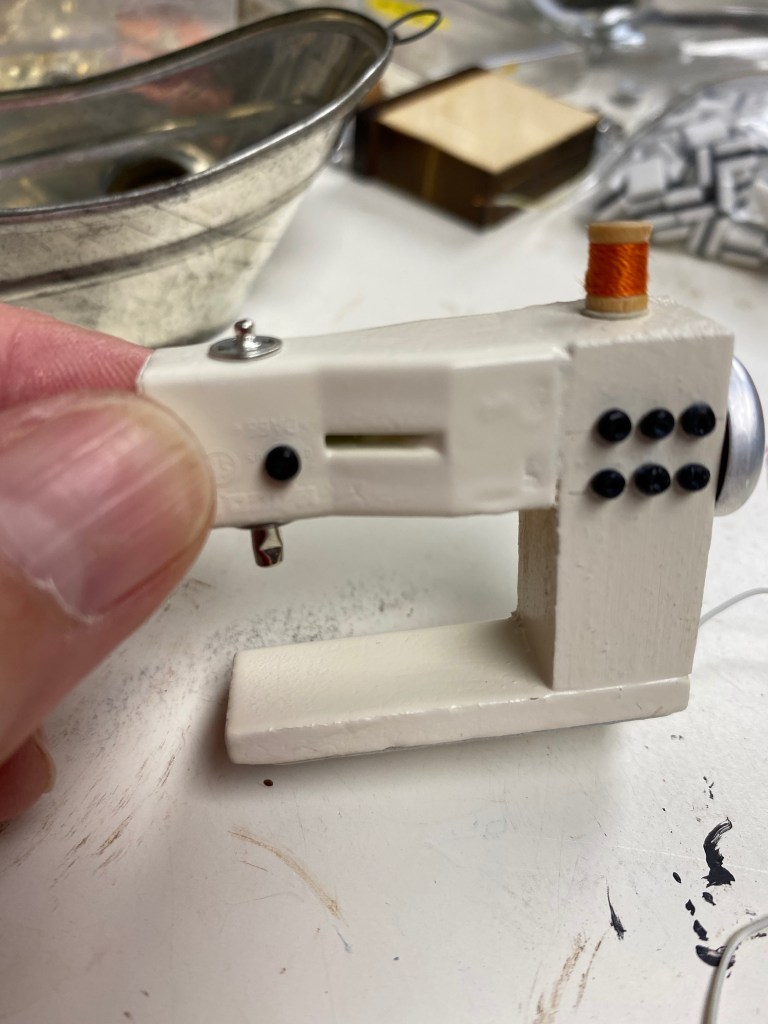
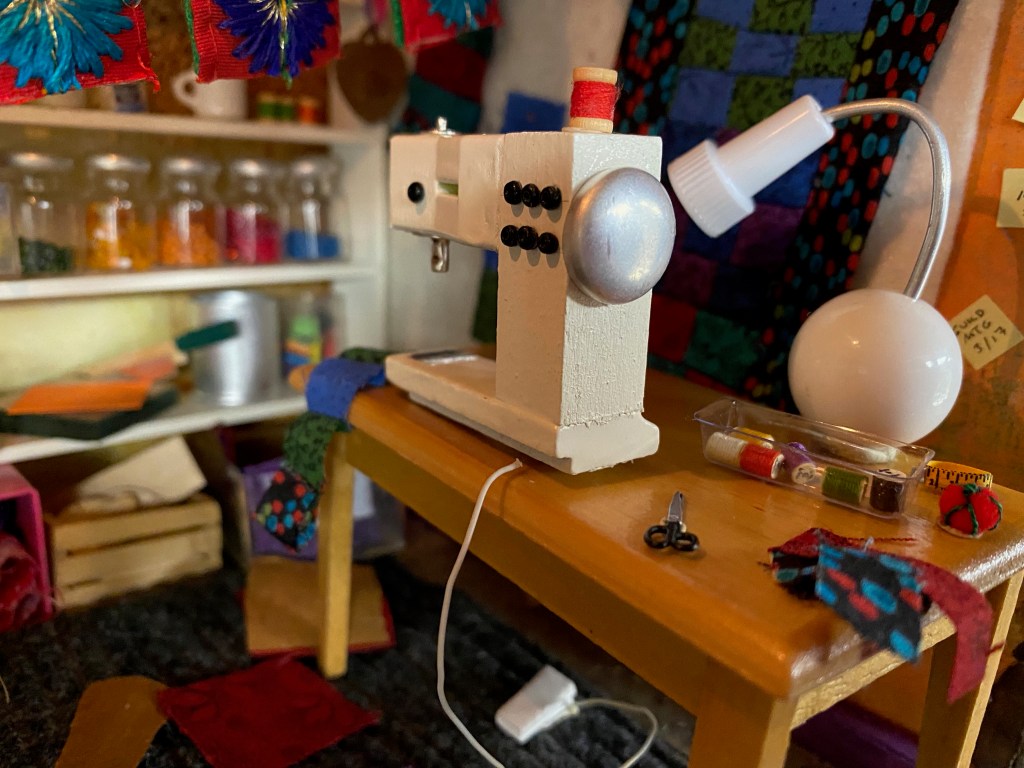
Next, I built the sewing machine. It took awhile for me to find the right pieces to build it but once I discovered this electrical-connector-thingie in one of my junk boxes I knew I was on to something. With a little glue, paint, snaps, buttons and foil, this is what I came up with:

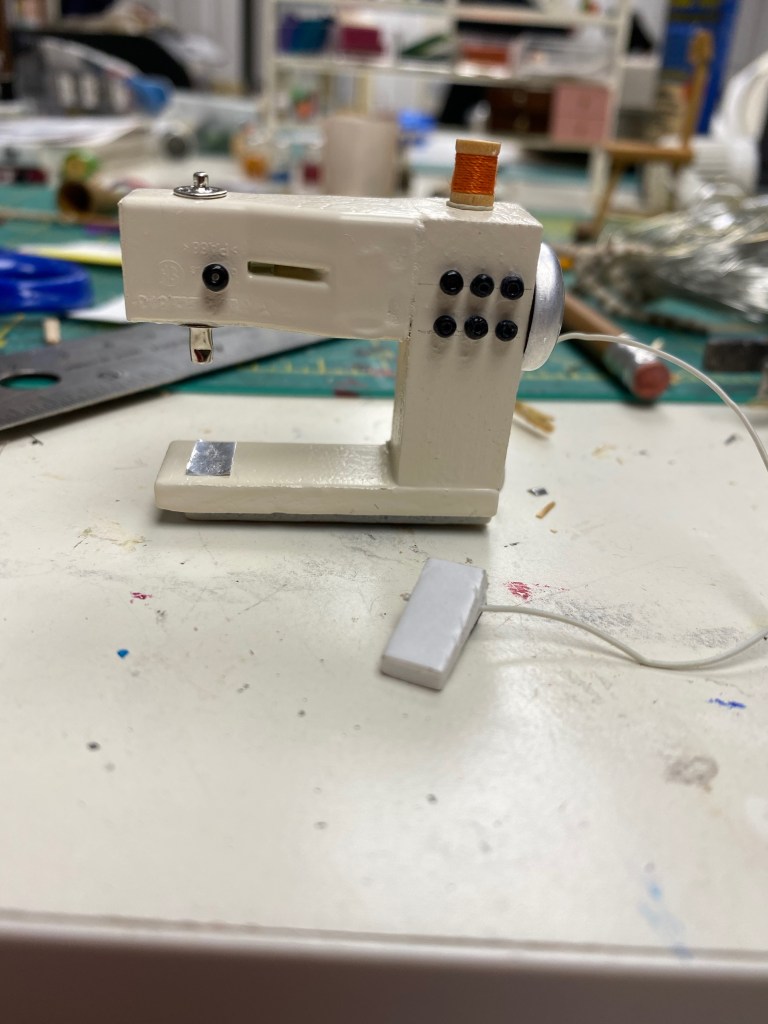
I completed the sewing machine “vignette” with a pedal and attached it to a table with assorted sewing supplies.

The Mouse House sewing machine.

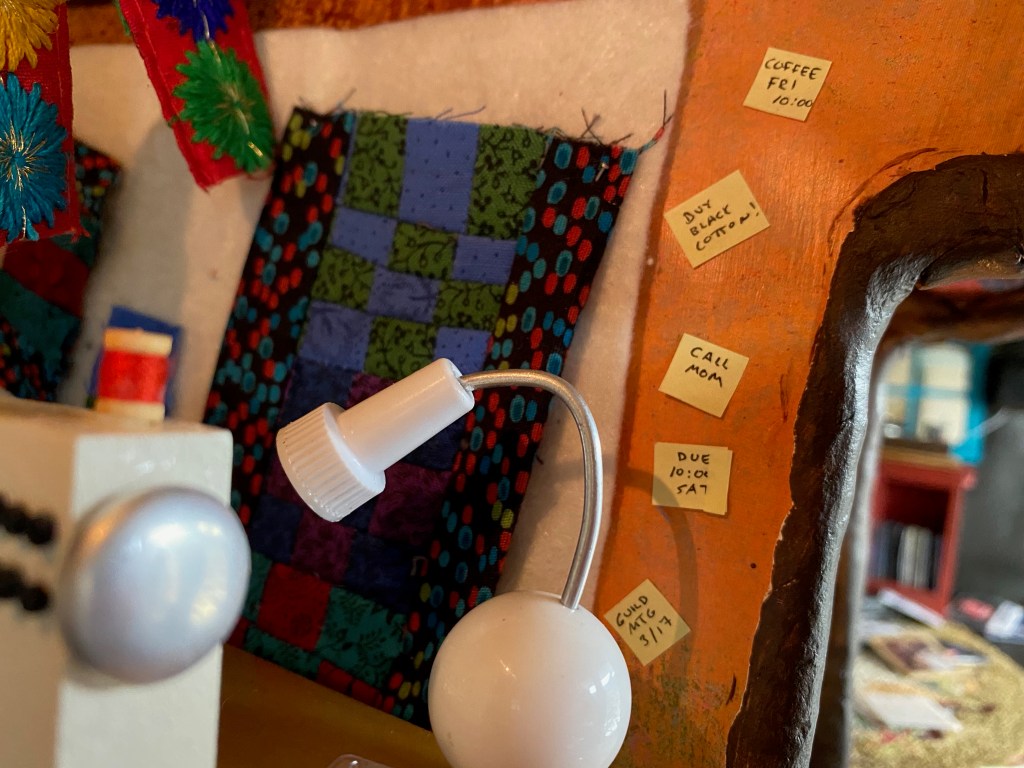
I added a design wall above the sewing table complete with a partial quilt and yellow sticky-note reminders on the wall; an ironing space on top of a fabric cupboard; a trash can; table lamp; more sewing supplies; and a banner I made from trim I bought on my trip to India in 2020.

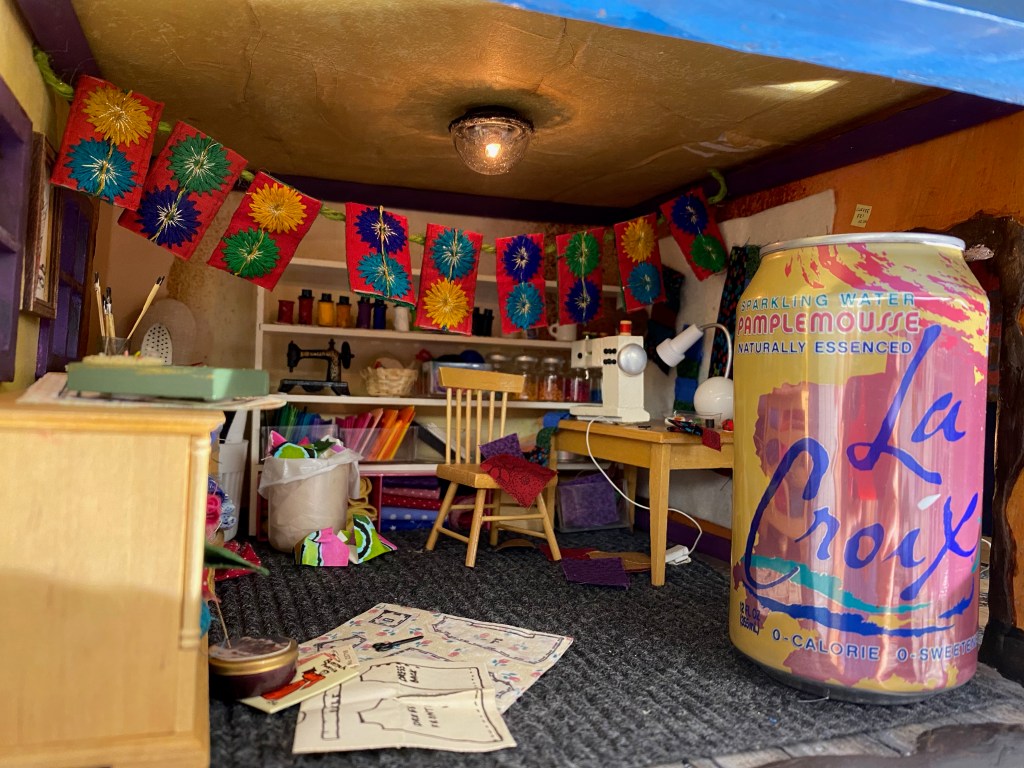
I still need to add some books and some munchies, but I’m excited to move on to the kitchen and pantry. I’m calling this room complete for now.

The Mouse House art studio.
The Mouse House art studio with the can for perspective.

The Mad Scientist

I recently completed a four month online course in illustration –Lilla Rogers and her “Make Art That Sells” Bootcamp. The class generated so many ideas, including a children’s book based on this Mouse House, but it took up most of my time and I was unable to work on this beloved project. The exciting news is that I shared this blog with Lilla and many of my classmates so they can follow my progress and share my enthusiasm.

I finally finished the Mouse House Study last week. It’s a spot for the scientist mouse who tracks and collects butterflies all over the world; plays the violin; dabbles in geology; experiments with chemistry; and enjoys reading newspapers in front of the fireplace.

The “Scientific Study” in the Mouse House.
The cozy corner in the Mouse House study.
Note the maps tracking butterfly excursions, the Bunsen burner, more books in the bookcase, etc.

I started with the fireplace which I designed and built myself. (See previous blog post here: The Heat Is On!)

I then focused on the table and all of the accessories I wanted to display. This included a microscope I made out of an IKEA shelf support and a tape dispenser lid. I also made a box of mini slides with dabs of paint on teeny pieces of plastic.

After that came the butterflies: I made a framed display and also made domed dioramas to put on the table and the mantle. I printed butterfly prints for the walls and added a map with string “markers” to document the butterfly excursions.The room was completed with books I made and other accessories I have built or collected.

The butterfly collection in the Mouse House.
A butterfly “diorama”!

I made the Bunsen burner and stand out of a few of the tiny electrical parts my dear friends Mark and Leann have given me over the years. The “flame” in the bottom of the burner is an orange bead.

The Bunsen burner made out of electrical components.

I filled the beakers on the table and on the bookshelf with nail polish also given to me by Leann. The “white” beakers are two of the things I like the best in the house so far–the nail polish glows in the dark! Here are a couple of photos with the lights off. Isn’t that cool?!!

The magic of glow in the dark nail polish!

The Mouse House Study with can for perspective.

Next up: the Art Studio. I’ll try to duplicate a bit of what I have going on in my own space. Wouldn’t it be fun to make a Mouse House in the Mouse House? Don’t hold your breath!!